
Summary
Generating a return label and documents for your customer. You can begin this process once a shipment’s status marked as Delivered and a return is requested by the customer.
Step 1: Select the order to be returned
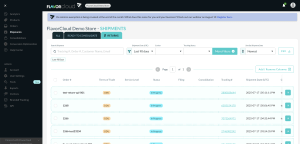
On the shipment grid, navigate to the shipment you wish to create a return for. Searching by tracking number, order number, or customer name can make it easier to find the shipment you are looking for.
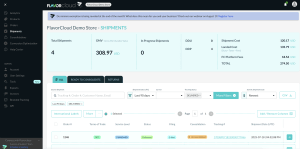
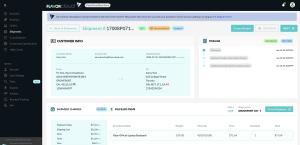
Clicking the shipment in the grid will take you to the shipment details screen. From the shipment details screen, click on the “Create Return” button to start the return process. You will only be able to see this option if the order has been delivered.
Step 2: Select items to be returned
When clicking on the “Create Return” link, another window will open where you can select the items and number of units to be returned.
Step 3: Generate the shipping rate for the return
Once you have selected the items to be returned, press the “Rates” link. You will see the rates for the return and will need to charge the customer for the same unless you choose to pay the return costs.
Step 4: Fulfill the return & generate a return label
Once rates have been calculated, press the Return link on the Returns screen. You will then need to email your customer the return labels and documents.
The return will show on the “Returns” tab of the FlavorCloud dashboard and will have the documents and labels associated with the return that can be emailed to the customer.
If you are looking to set up an integration with Loop Returns, learn more at Setting up Loop Returns with FlavorCloud.